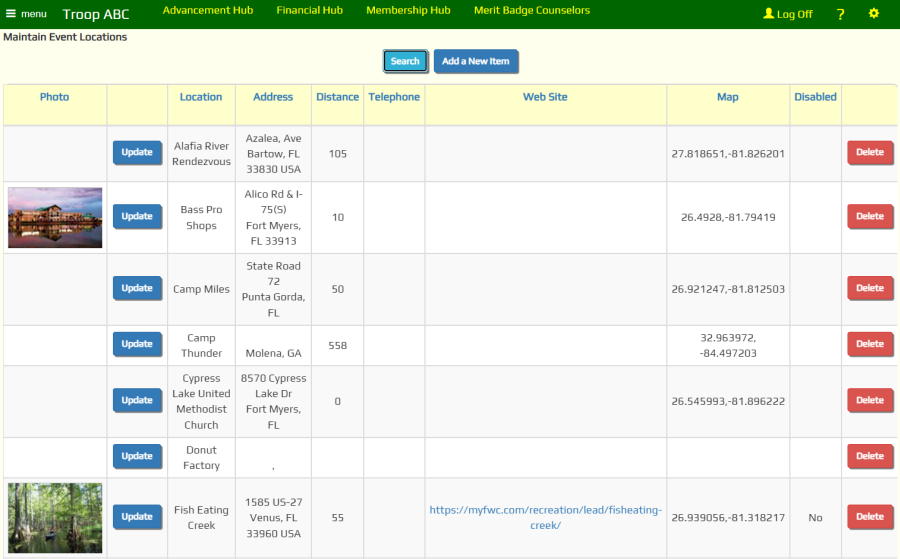
Most troops have a number of locations that they return to time and time again. Their meeting place, favorite campgrounds, local atractions.
Once you create an Event Location record you can reference it every time you schedule an event for that location.
Select Maintain Event Locations from the Calendar menu to get started.

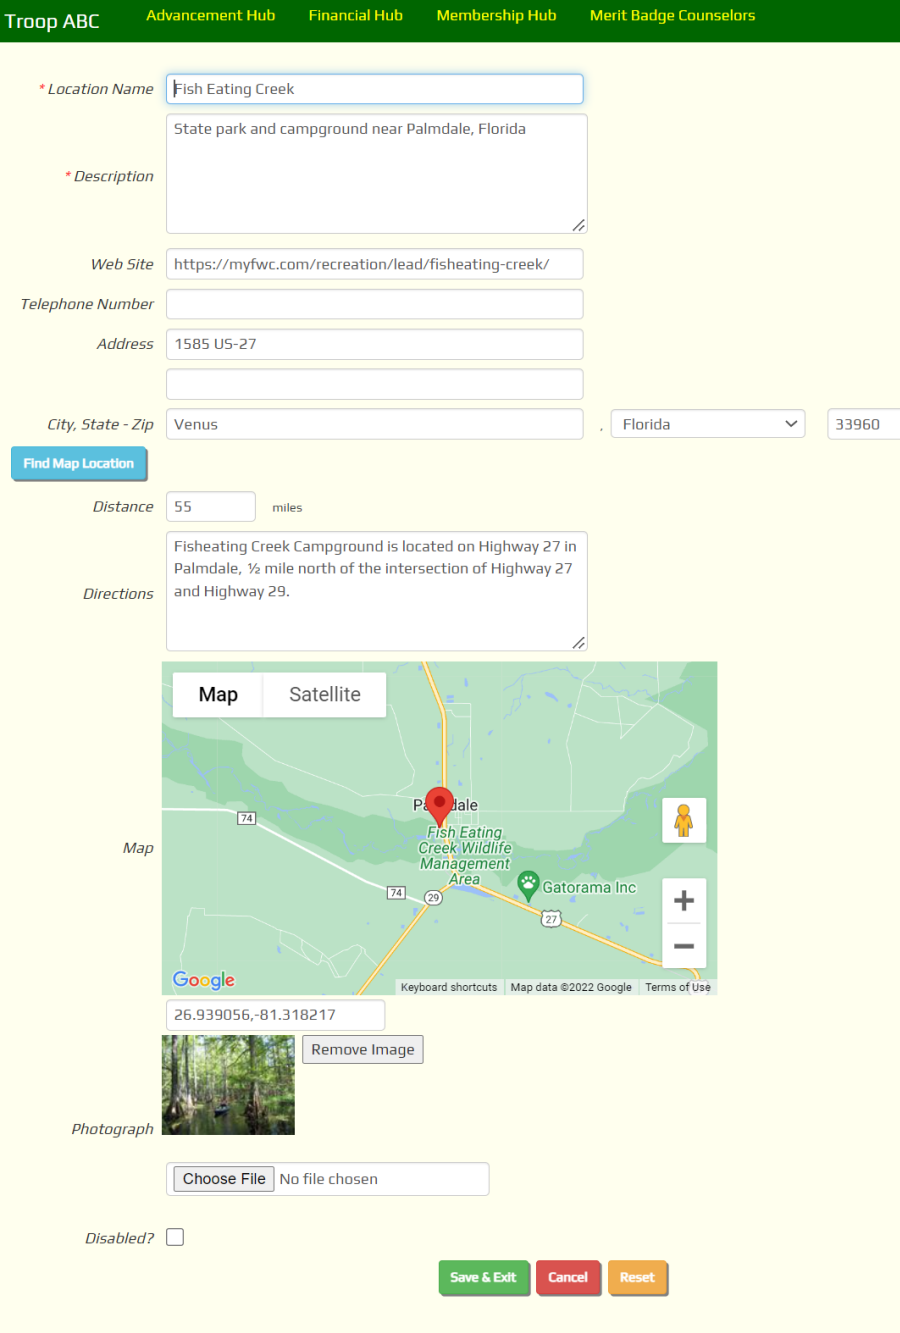
Click Add a New Item to add a new location to this list. That will bring up a page that looks like the one below.

The Location Name and Description are required, as indicated by the red asterisks.
After you fill in the Address fields, click Find Map Location to look up the geographical coordinates for this location. If the address is valid, you should see a map appear below the directions box.
If you do not have an exact address for the location, you can enter the latitude and longitude directly into the Map field. Note that longitudes in the western hemisphere are expressed as negative numbers.
The Distance is the distance from your regular meeting place. This will be a big help to your treasurer if you compensate drivers for mileage.
Most location lists are sorted by distance from your meeting place, with the closest locations appearing at the top of the list.
Be sure to enter your regular meeting place as a location. If this is not your chartering organization, be sure to enter a location for that group as well; you'll need this when you create your ScoutNET™ files.
To upload a photograph of this location, click the Browse button to locate that image on your local disk. It will be uploaded when you save this record.
To replace a photograph of this location, click the Remove Image button, then click Save & Exit. This will delete the old image. Then update the location again and use the Browse button to select the new image. Then click Save & Exit to save the new image.
Check the Disabled? box to prevent this location from showing up on drop down lists for events. This will not cause a problem for past events that referenced this location.
Click Save & Exit to save your work.